When making a key visual, I mostly work on my own, under the direction of the client.
They provide me the rigged 3D characters and I take care of all the rest: creative concept, 3D modeling and surfacing of the environment, 3D layout, lighting, rendering and Photoshop post-treatment.
On some occasions, if the project requires it and if the budget allows it I can also set up a team for my client (additional rigging artist, 3D artist, environment artists etc.) to create bigger, more detailed artworks. Every project has different needs and flexibility is key!
Here is my usual step by step process on a key visual:
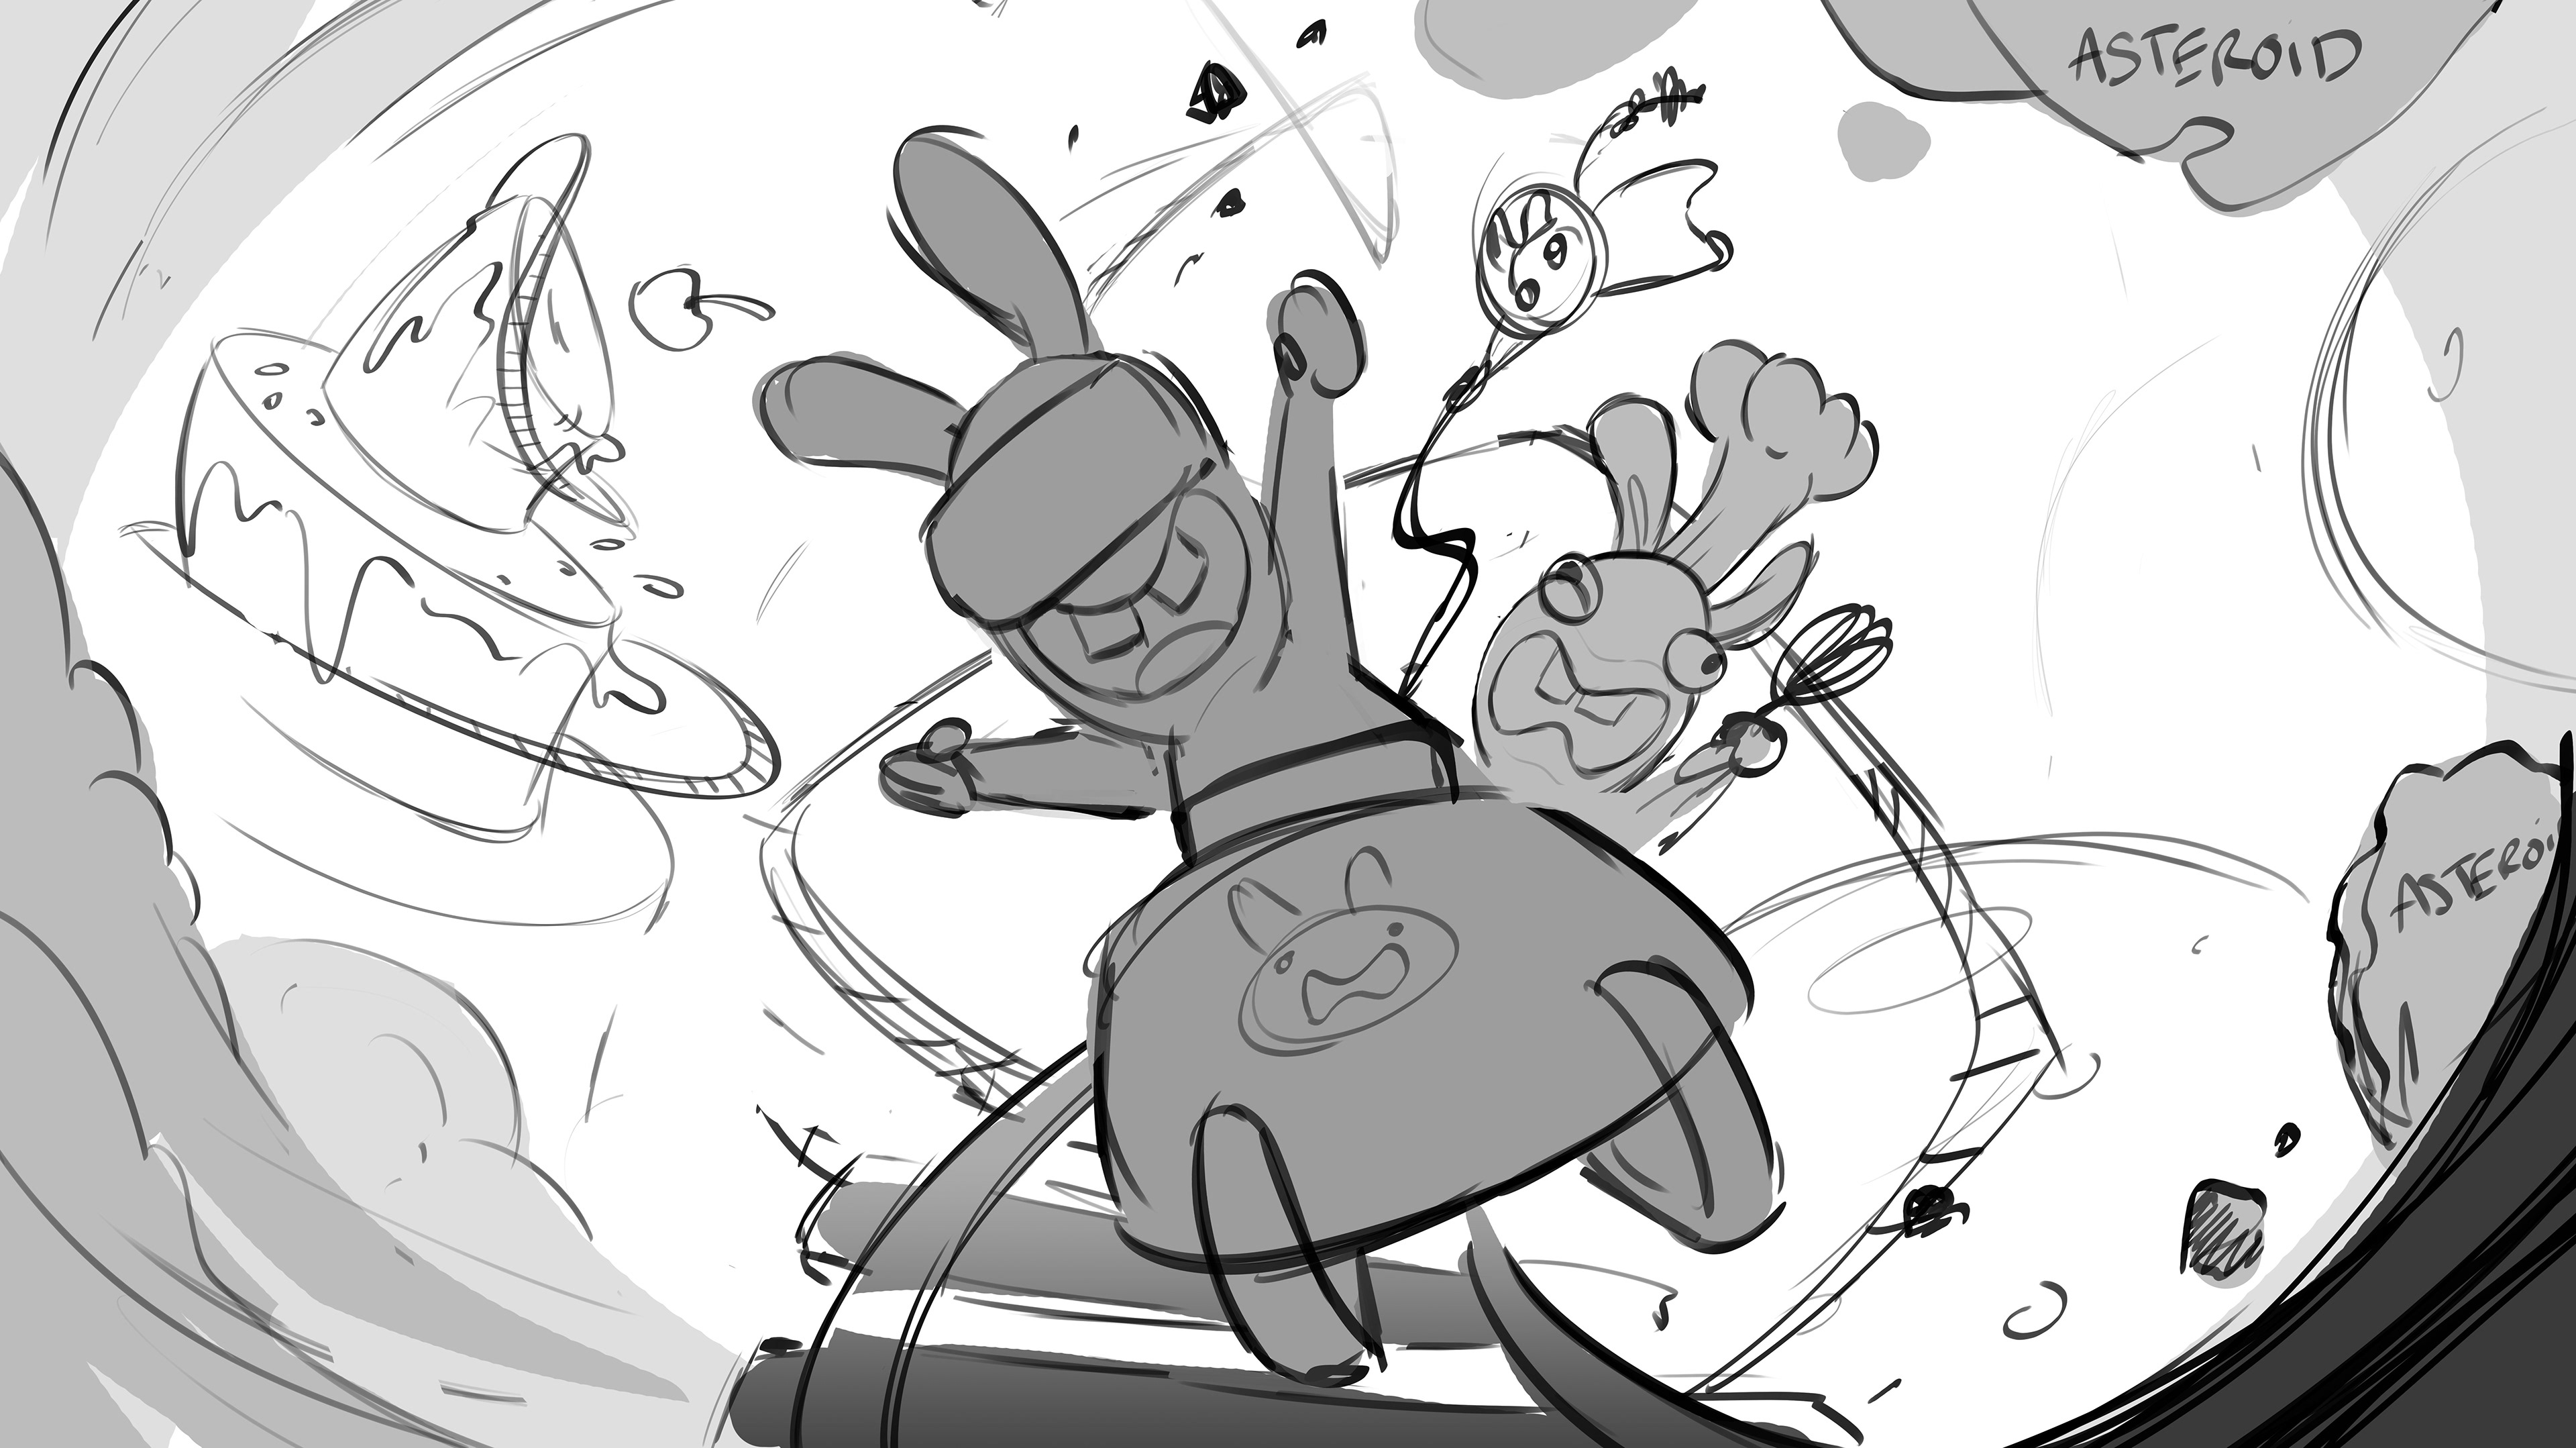
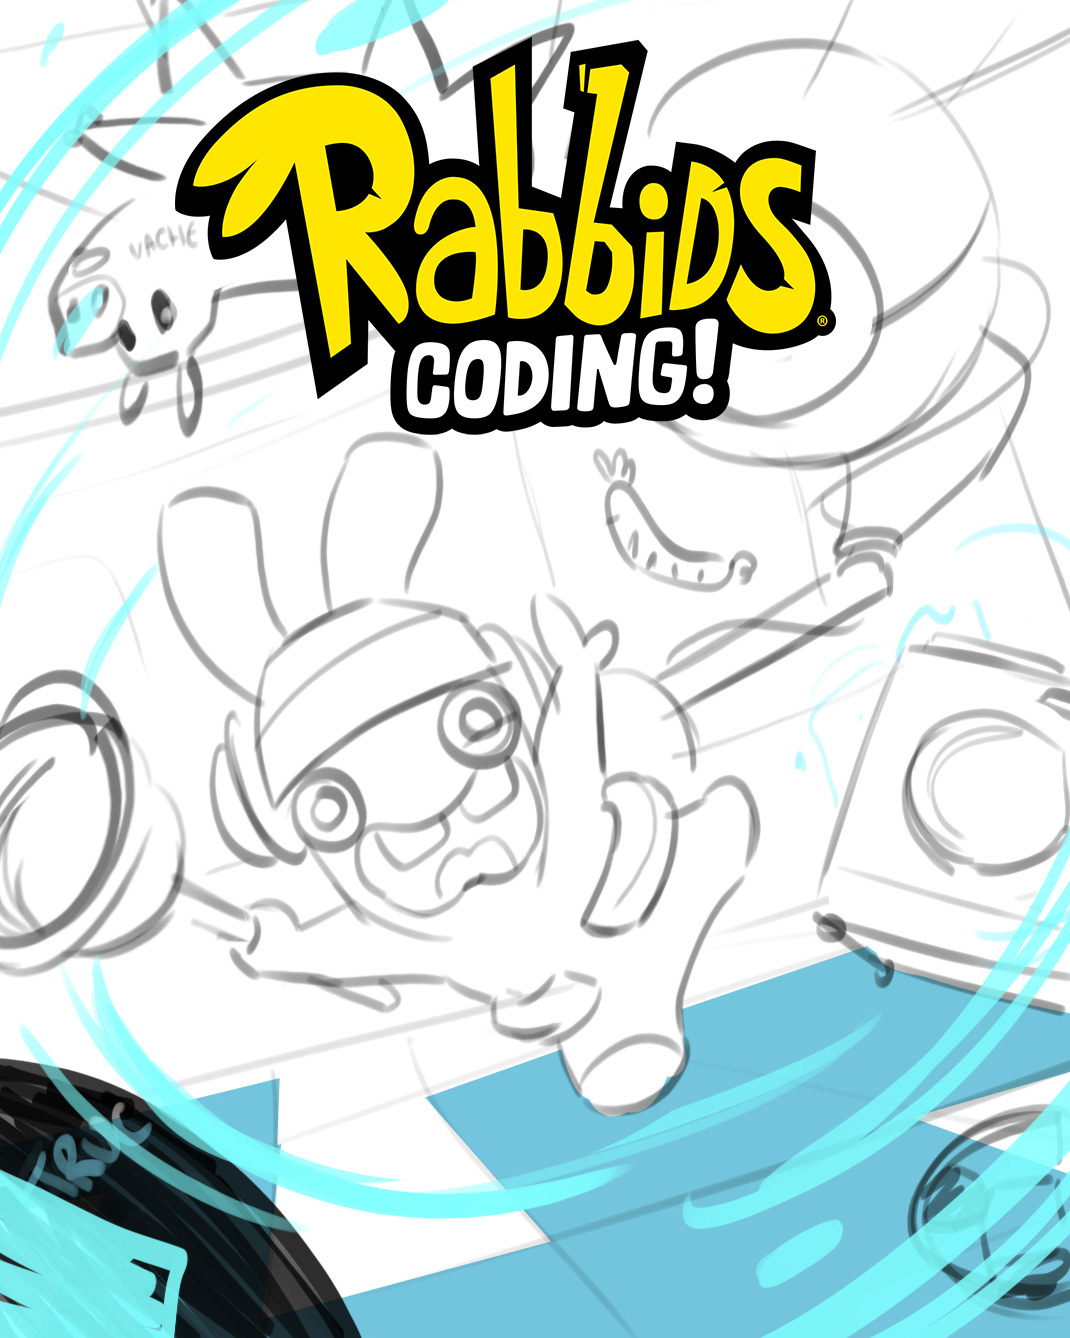
Step 1: Rough Sketch
In order to settle for an idea and a composition, I make a few rough sketches, and provide some references, for the ligthing and mood.
This way, the client and I can discuss on the overall direction of the keyart and brainstorm ideas.
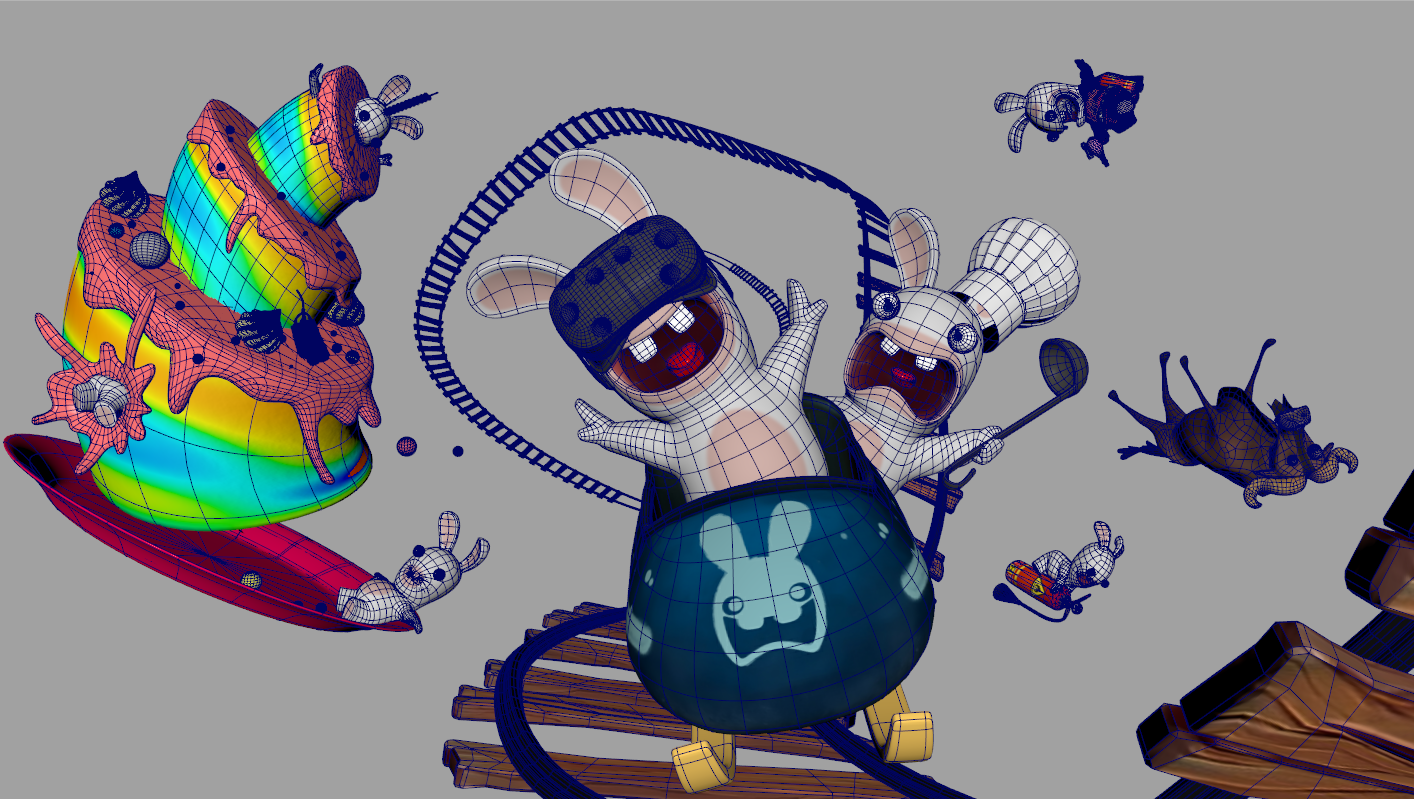
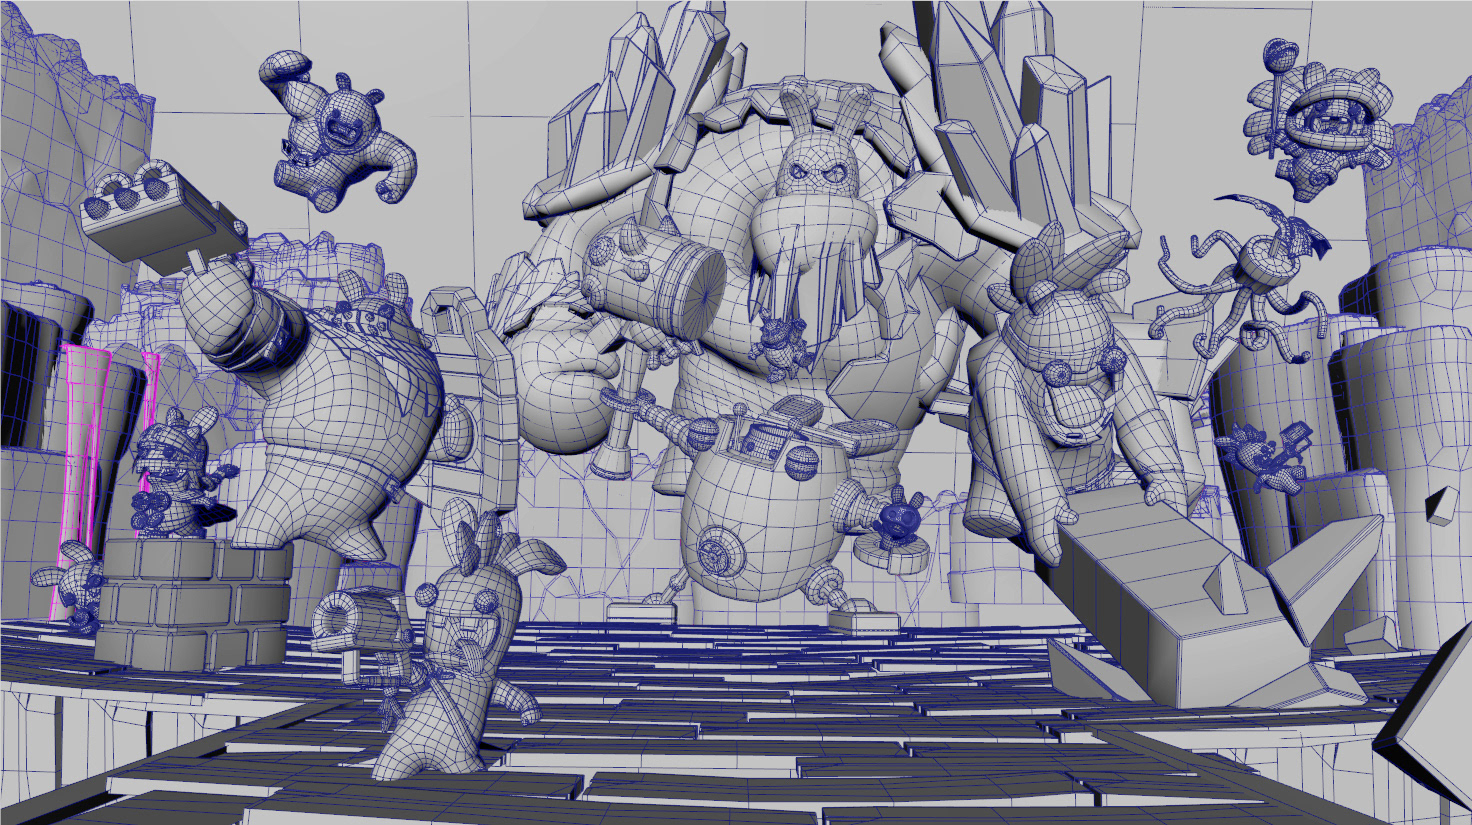
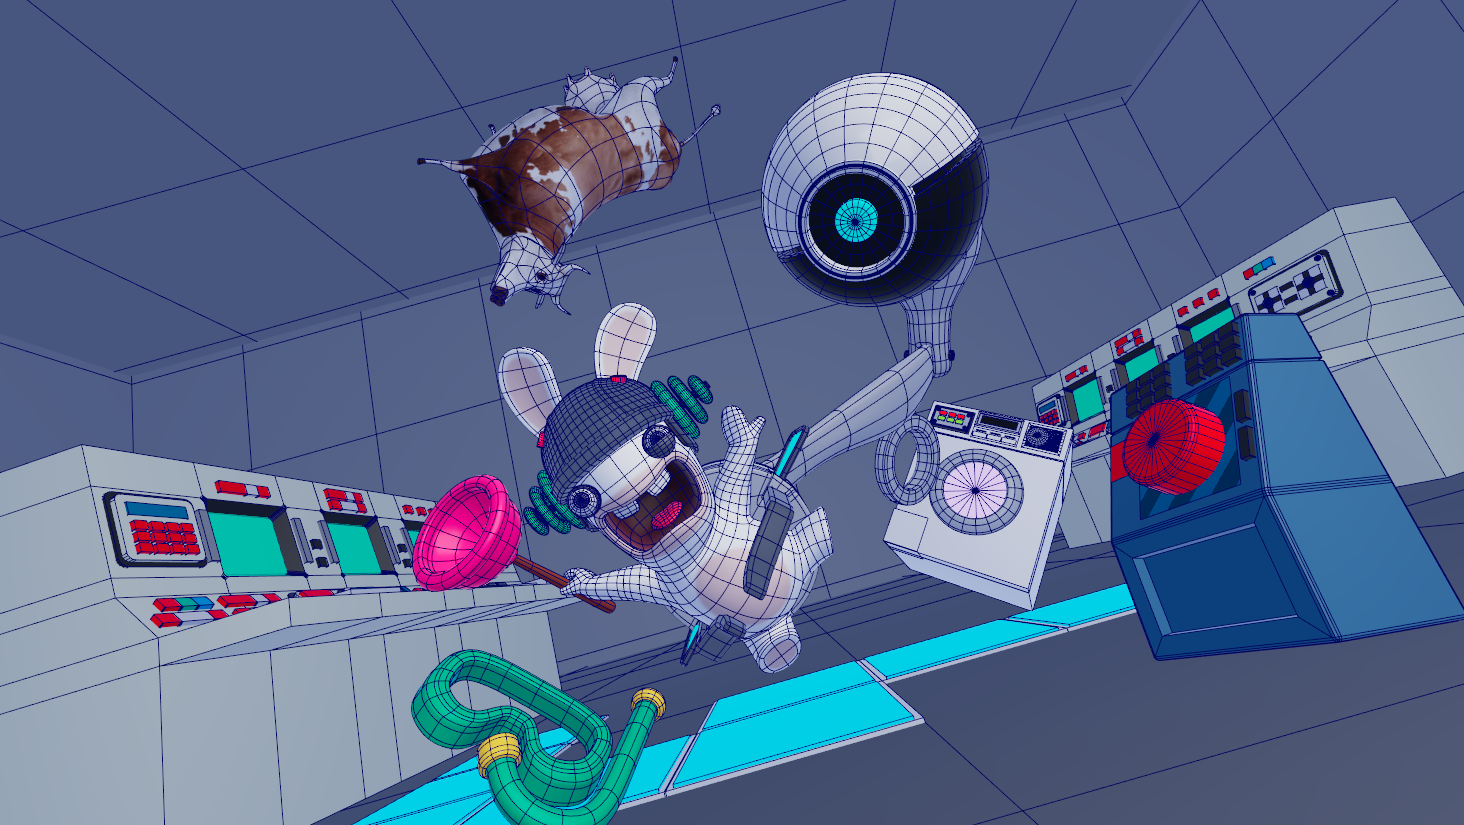
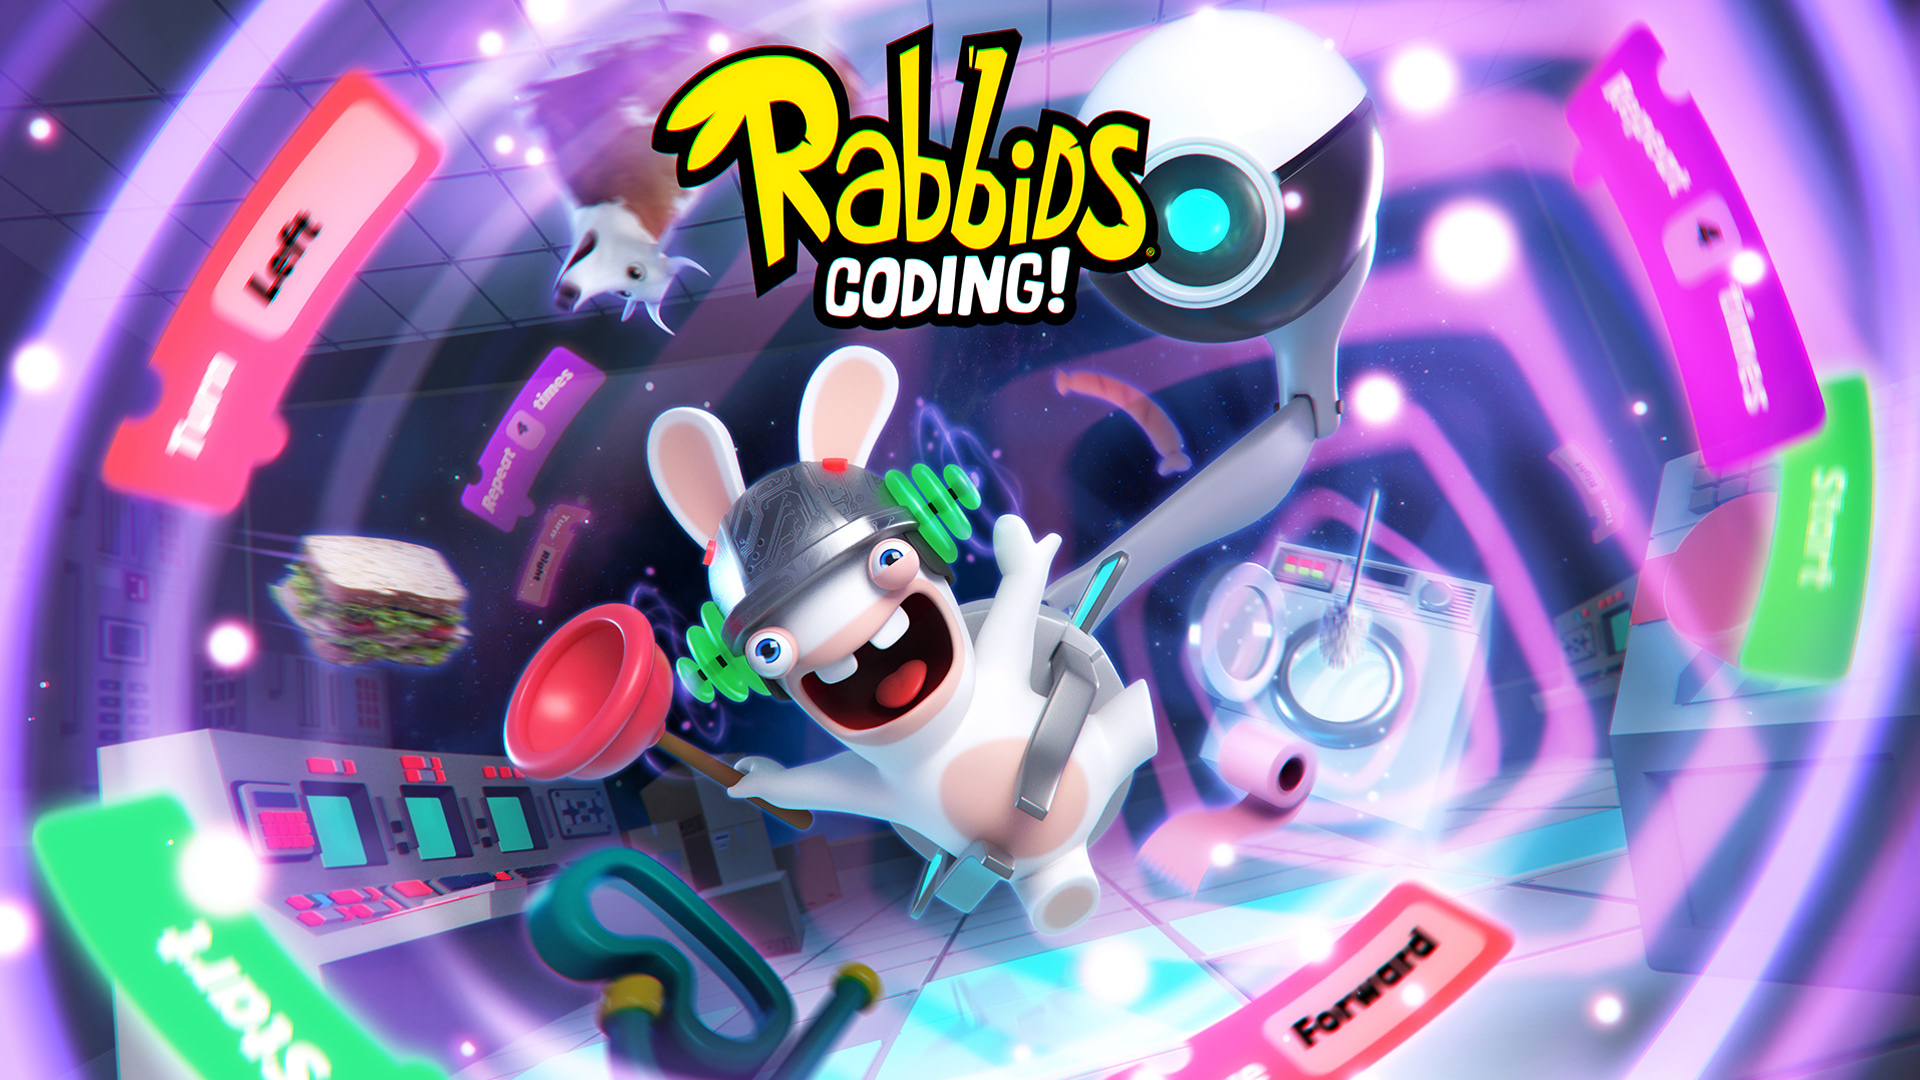
Step 2: 3D Layout
Once we've agreed on what we want, I gather the 3D assets the client can provide me (preferably the rigged characters, and as many 3D props as they can).
I then go to my 3D software, Maya, and start modeling, texturing and shading the 3D assets missing. When I have all the elements I need, I assemble them in a 3D scene.
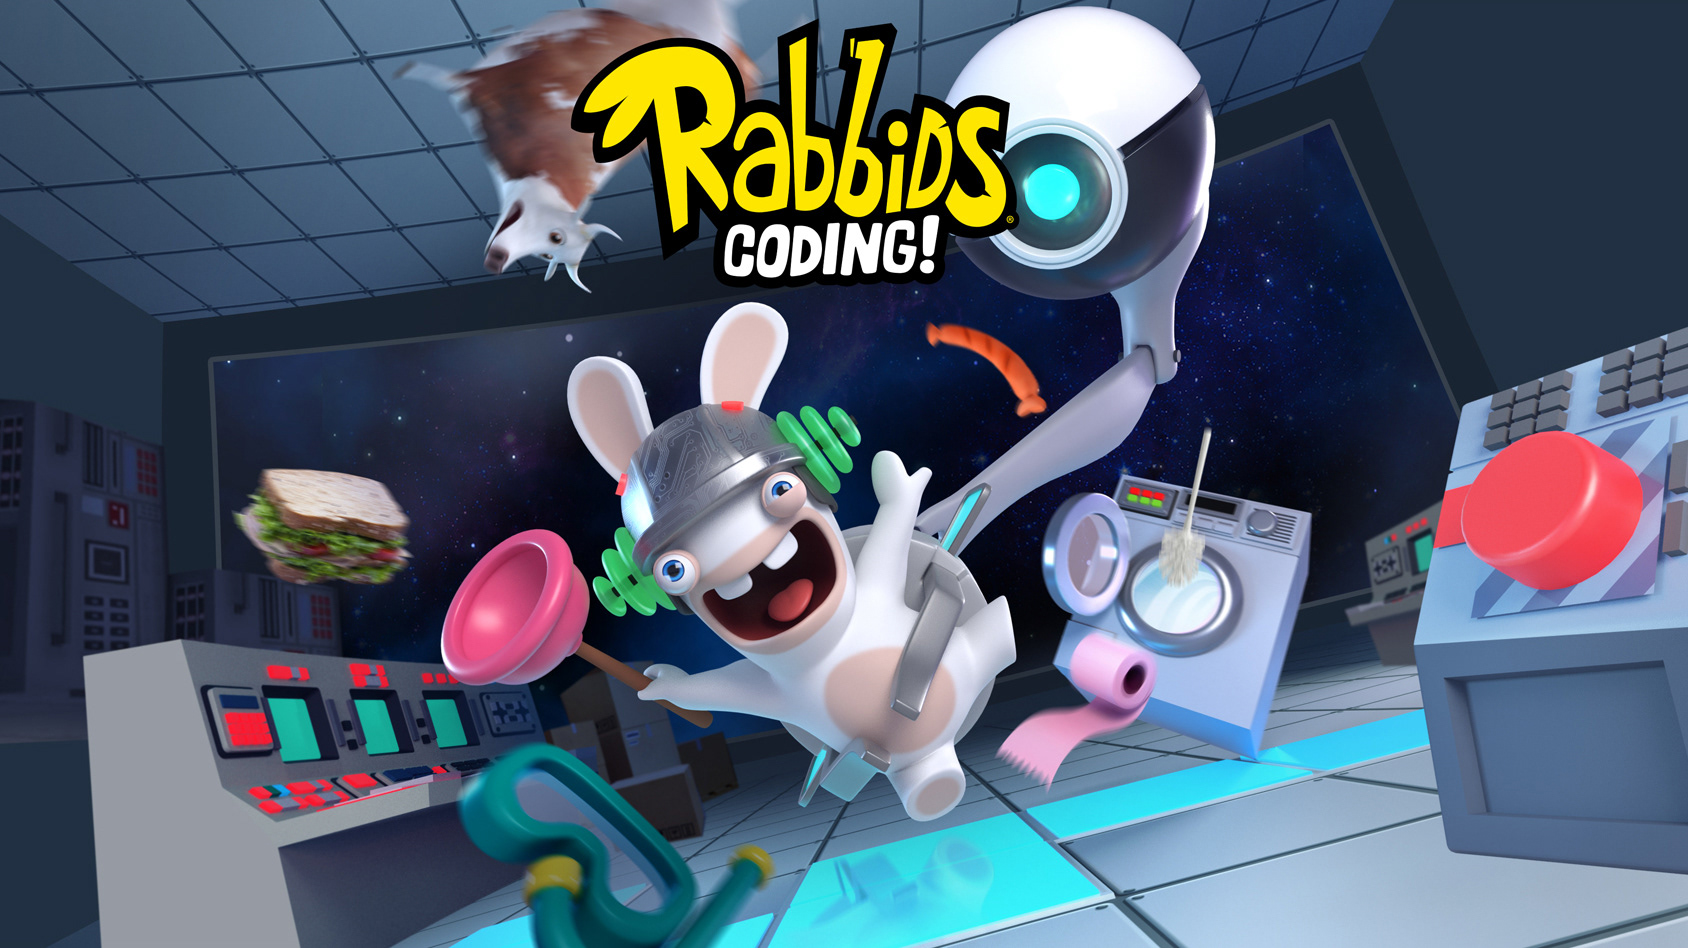
Step 3: 3D Rendering
I set up the lighting, make finishing touches on the shaders, and render my image in a high resolution (around between 6k and 7k usually, depending on what the client needs).

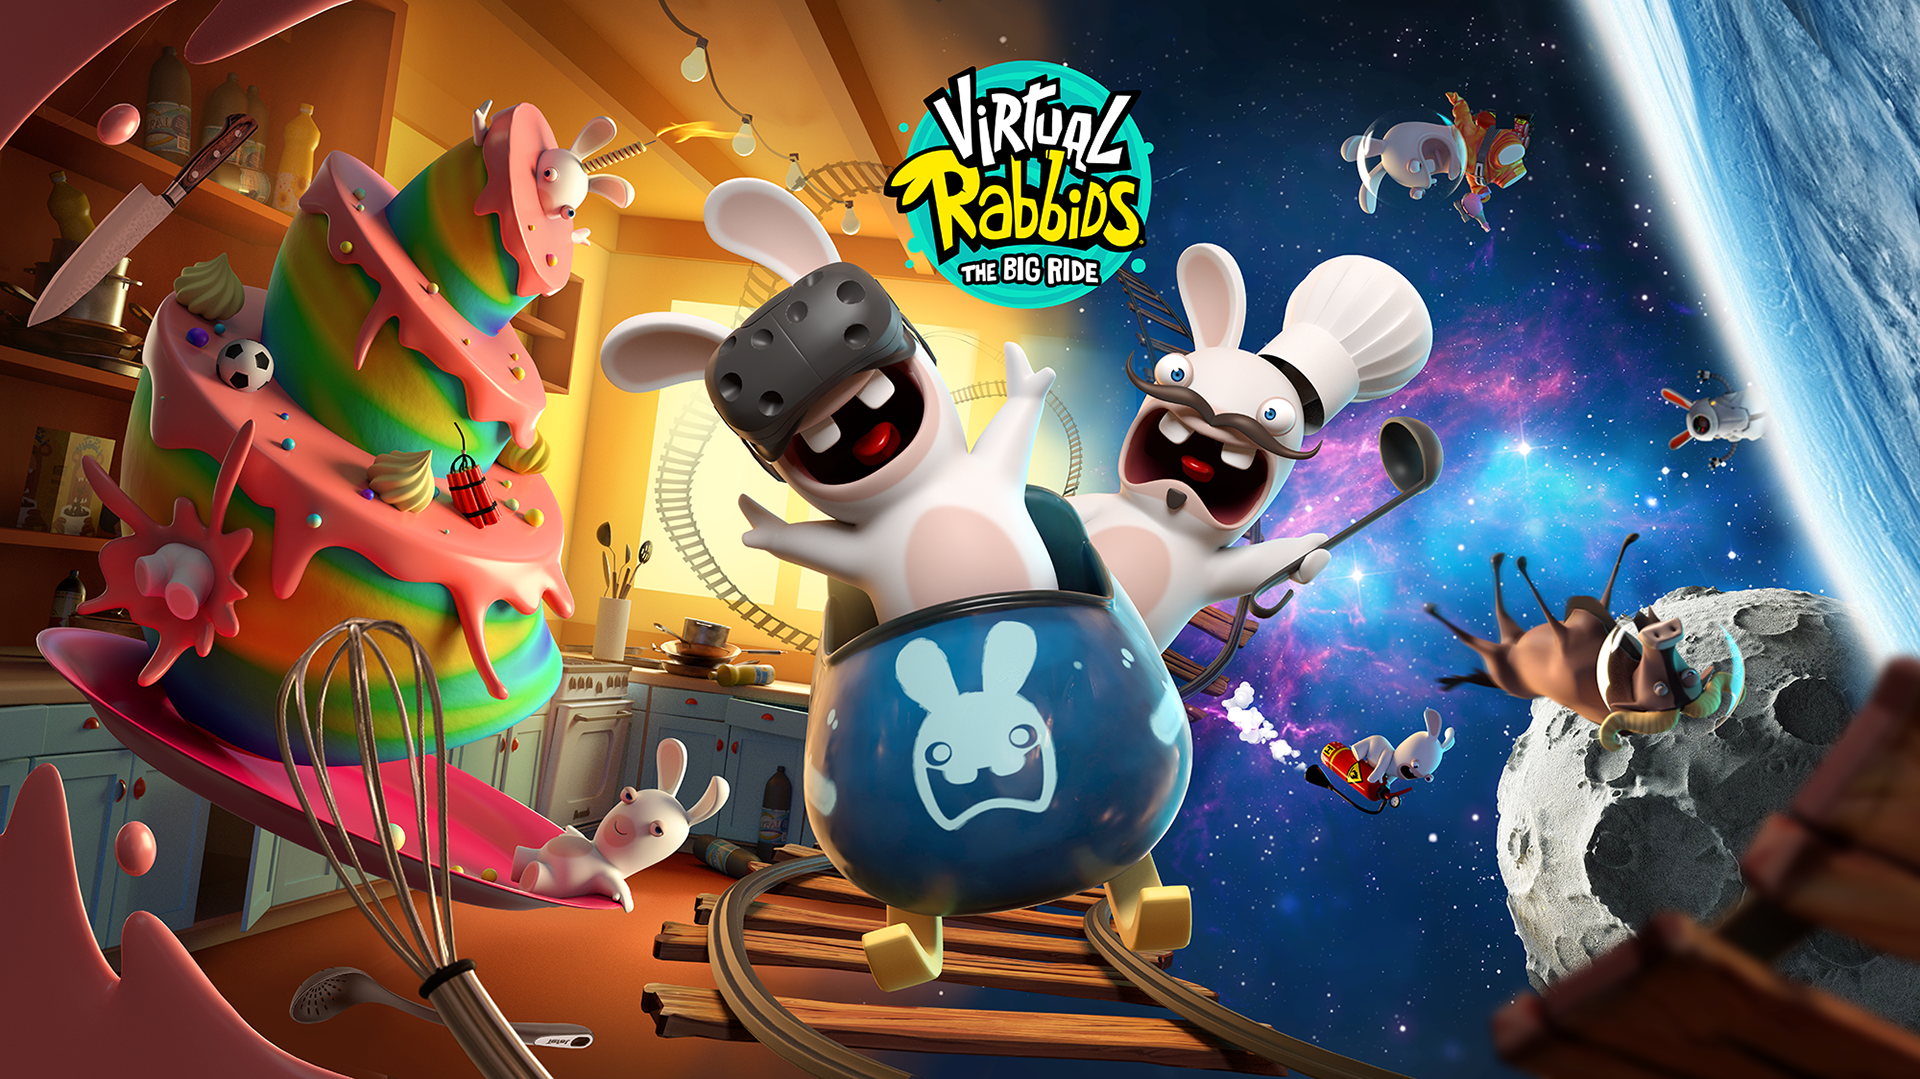
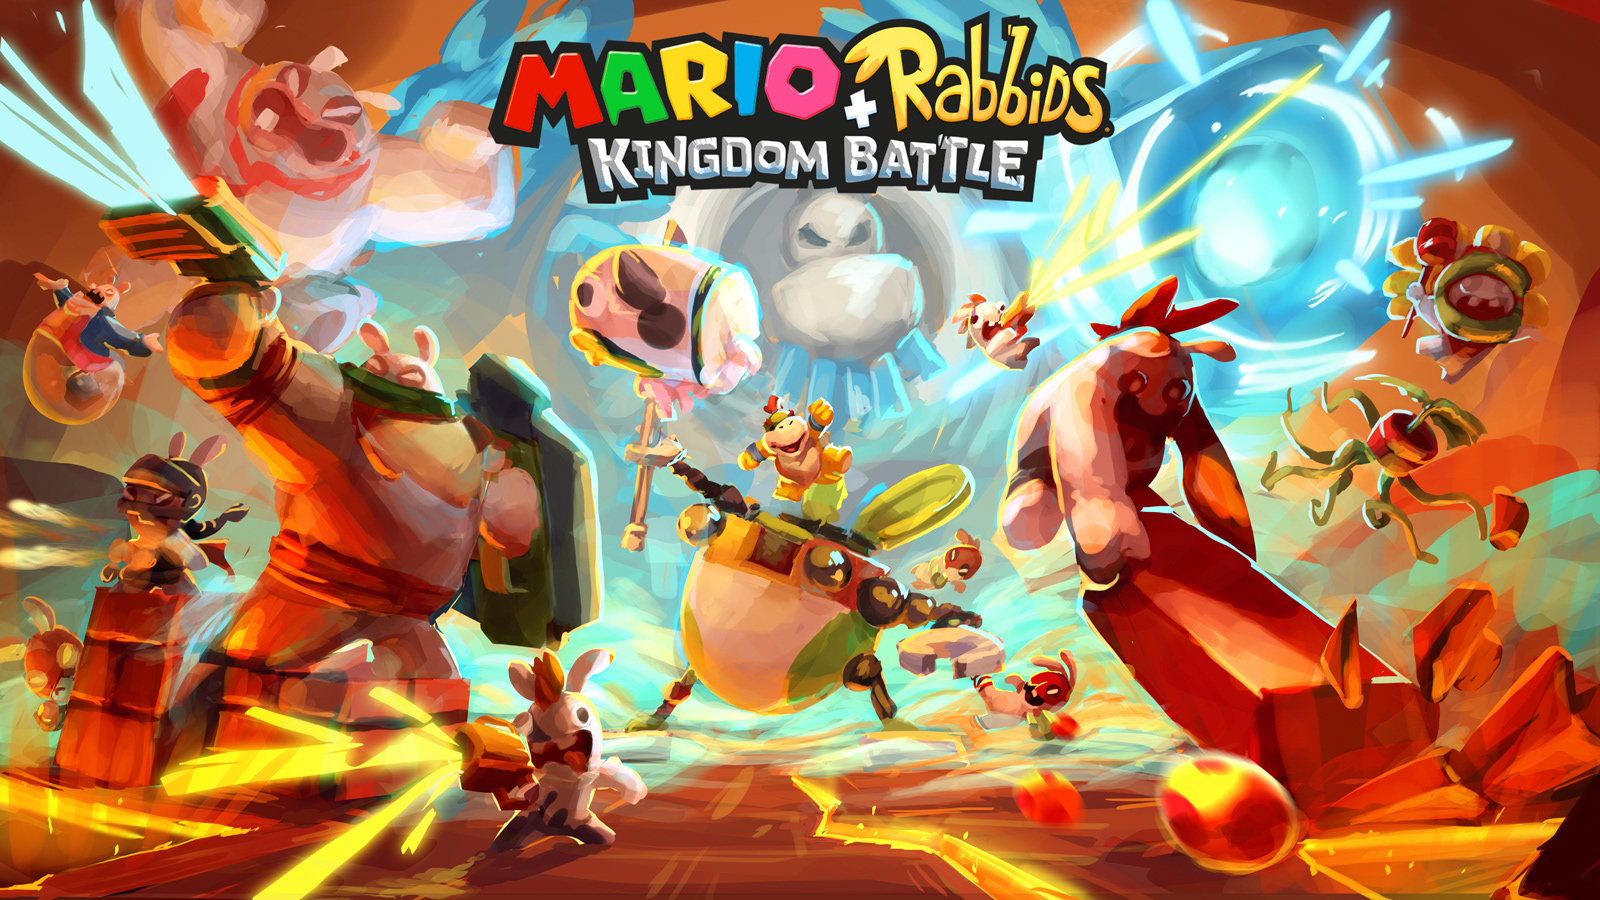
Step 4: Photoshop Editing
I send my 3D render to Photoshop and start the most important part of the job: the final Photoshop post-treatment.
I correct the lights, the colors, add FXs, blur, some glow, and many details.
And that's it!
Other examples of my sketch VS the result:

And another one:
If you need any additional information on my process, don't hesitate to contact me!